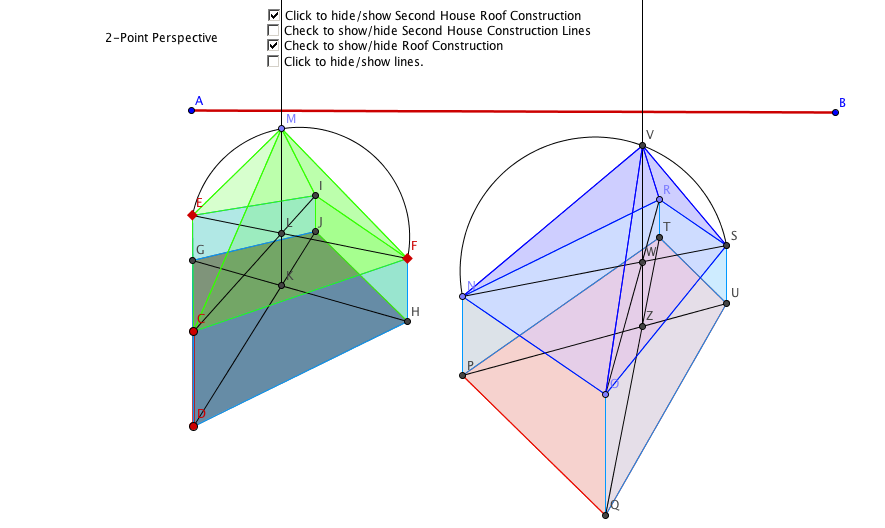
1 & 2 Point perspective labs
Geometric 3-D Model project
Below is a slideshow with pictures of our 3-D Geometric model project. It will play automatically or you can click through the pictures faster by using the arrows when you mouse over the picture.
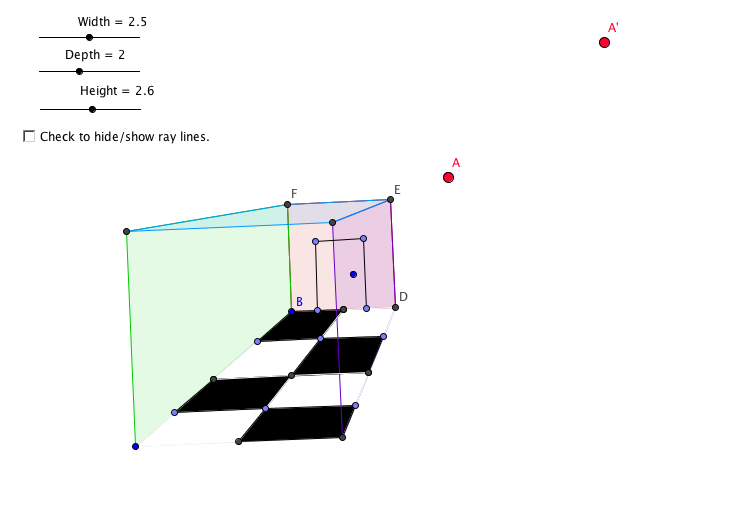
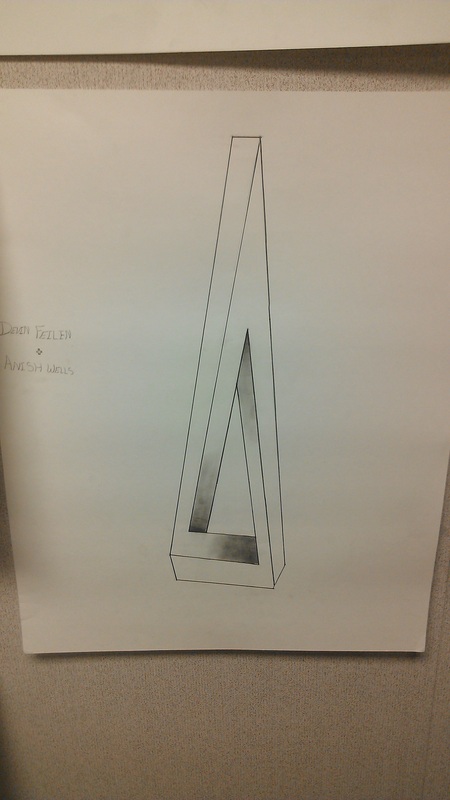
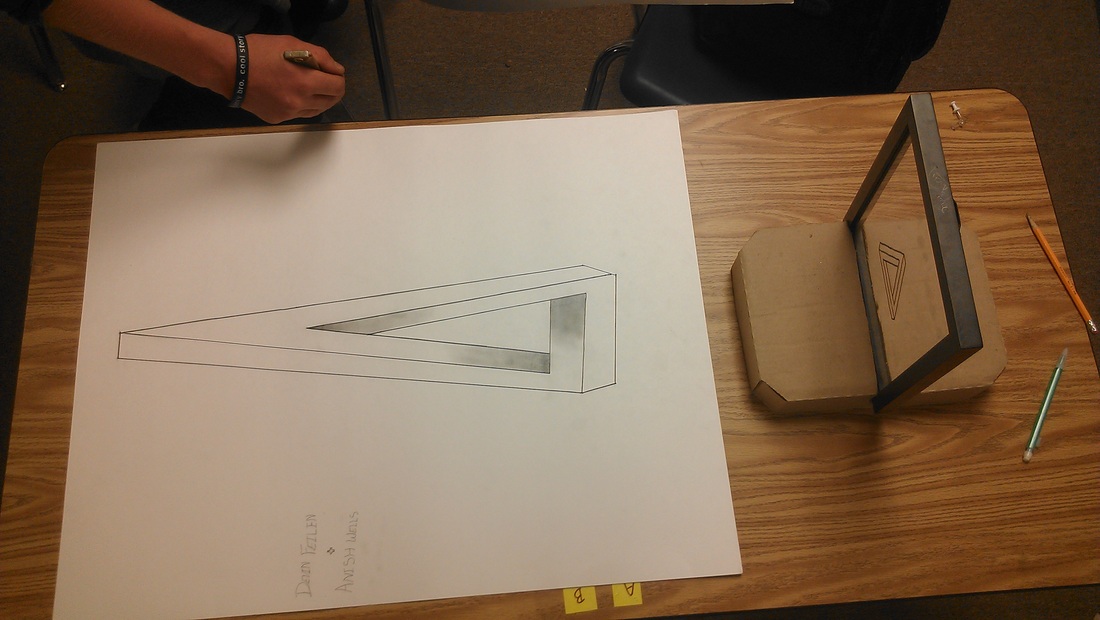
My Anamorphic 3-D Drawing project
Below is my final drawing for the Anamorphic 3-D Drawing project.
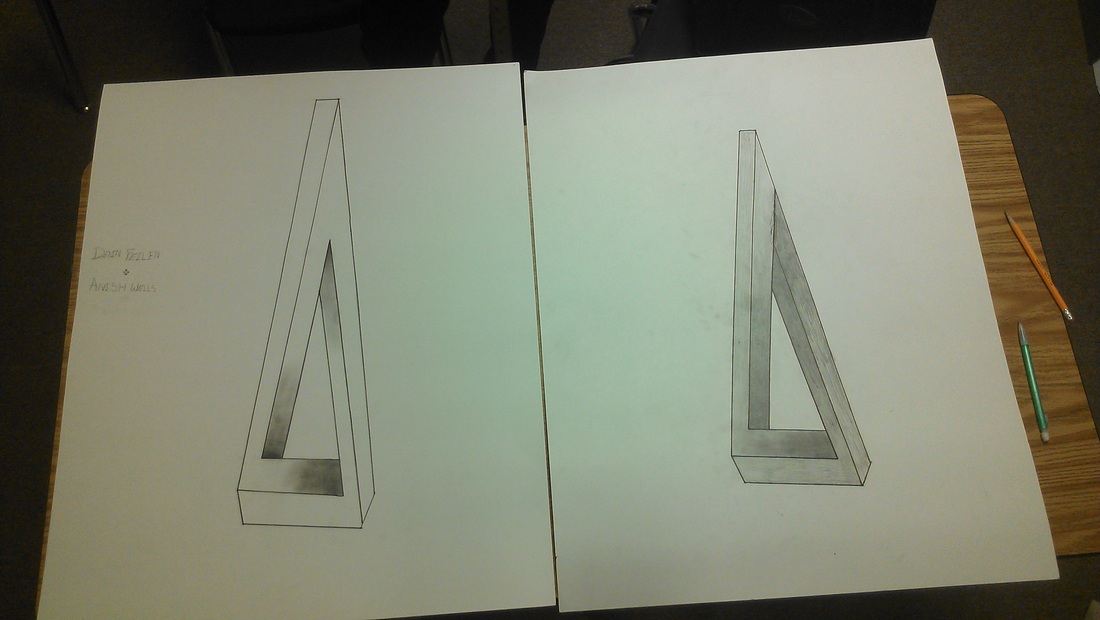
Below is the before and after we had to refine and revise our project. On the right is the final project, and the left is the 1st version that was revised.
Below is the picture just as we finished our project, and this was how the picture was created.
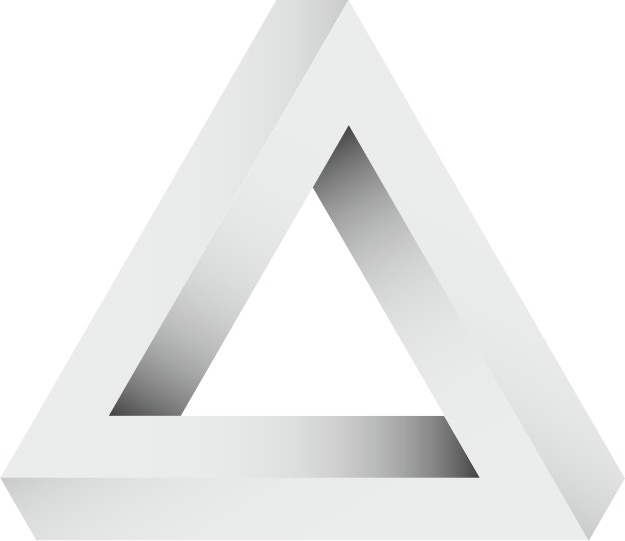
Below is a transparent computer rendering of our 3-D Anamorphic design.
Below you can find my write-up for this project.
Using clinometers to measure angles in the real world
Hexaflexagon
My Hexaflexagon's patterns were a great representation of line-reflection, and how each piece of the puzzle has a reflection. My design uses a lot of symmetry between each side of the Hexaflexagon, and it can be seen below in the pictures.
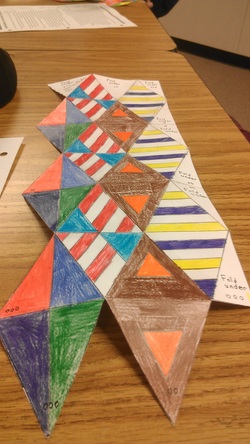
To the left is the original product that was created before it was folded and glued together to make the Hexaflexagon shape! Below you can find a picture of the finished product.
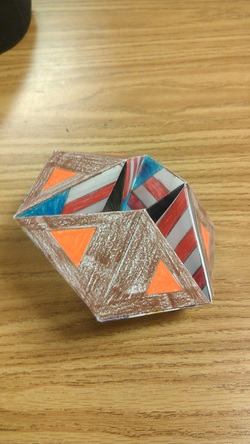
To the left is my completed, folded Hexaflexagon.
The feature that I like most on my Hexaflexagon, is the side that alternates purple, yellow and white. This turned out looking really neat in the final product, although sadly the finished product picture does not show that side. I feel that I could make a more symmetrical design on all the sides, I feel that my grasp on how exactly we were supposed to design each side was slightly flawed. I would make the sides a lot more appealing to the eye, and also a bit more advanced when it comes to symmetry. The only thing that I personally learned from this project was how difficult it is to design something that is nearly perfect on each side, and replicate that 3 times on each side. Also its difficult to make different and more diverse creations on each side, while having to be symmetric.
Snail trail graffiti (Geogebra lab)
The Snail Trail Graffiti lab was probably the most fun and rewarding Geogebra lab yet! It let us use our artistic side, and apply it to geometry! The idea was that you can take any point, and reflect it over a line, and where ever that original point goes, the reflection will fallow. So we did this but in a circle sort of like a pizza. Each "slice" had its own reflection of the point adjacent to it, and when using Geogebra's trail option, we created a really neat geometric creation! You can view one of mine below.
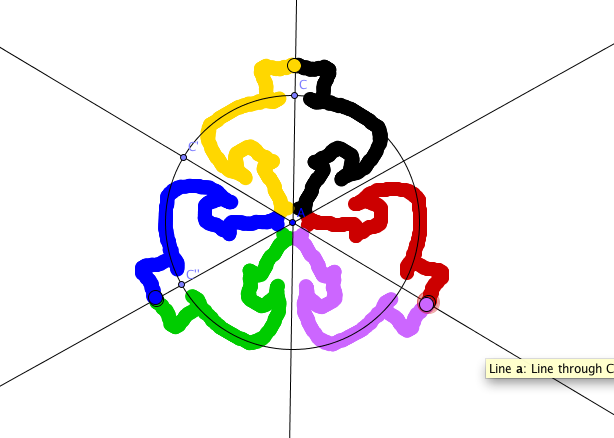
I learned a lot during this, mostly about opinions I had on Geometry and how this was going to turn out, but all my "I don't like this" emotions got blow away when I saw that you can create something really cool and apply it straight into what we had been learning about in class! This was a really enjoyable Geogebra lab, and I would love it if I got another opportunity to do something like this but in a different way.
Two Rivers (Geogebra Lab)
In the Two Rivers Geogebra lab, our goal was to figure out the best location to build a house, with some parameters. Your house was in-between two rivers, and when those two rivers intersected, there was a sewage treatment plant. You wanted your house to be as far away from the treatment plant as possible, while still being able to fish in both the rivers without walking to too far to each river. We designed the issue in Geogebra and this is the outcome! Below are screenshots of the lab and an explanation on how they work.
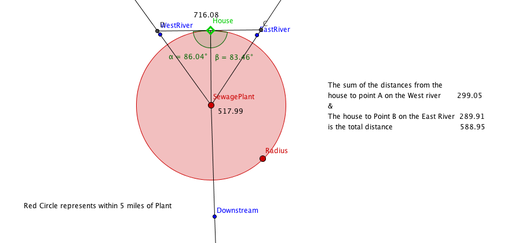
To the left is an example of where you would want to build your house! It is equal distances between the two rivers, and rests on the edge of the area that you do not want to be in because of the sewage plant. As you can see, the total distance from each rivers is really close, and is minor enough that you will not have to worry much. And, it is perpendicular to the sewage plant, which is indicated by the red dot. The red circle represents the area you do not want to be because it is too close to the sewage plant.
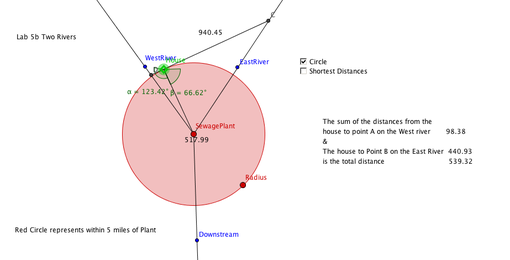
To the left is somewhere that the house should not be built. The distances between one river are not equal, and would cause you a lot of hassle to make it all the way across your property into the sewage plant area in order to get to the east river. This is something that would not be good when say the west river's fishing is bad, and you would need to walk all the way to the east river and back to go fish. The line is also not perpendicular between both rivers and the sewage plant, causing the amount of distance between the house and the rivers to be askew.
This lab was actually really interesting for me, and I hope its something that I get to use in the future when maybe I am building a house or designing something and have a problem related to this matter. This taught me a lot about how I can use different tools to figure out how to position something correctly, without just guessing or trying to do it another way. How I got the to my first answer (The first screenshot) was by taking the radius of the area that I do not want to be in, putting my house on that line, and finding the quickest way to both rivers, which would mean that the house has to be as close to the sewage plant area as possible, or the distances would just get bigger. On the second one (Second screenshot) I came to the conclusion that that was not the best area possible because of the distances between the rivers. Although it would be a very short walk to the west river, it would take me a lot longer to go all the way around the area that I do not want to go in (the sewage plant). This would cause me a lot of time and effort lost trying to get to the east river if I needed to fish there. This was a really useful and informative lab, and I hope that I will use my skills learned here in the future when I am building something of this kind!
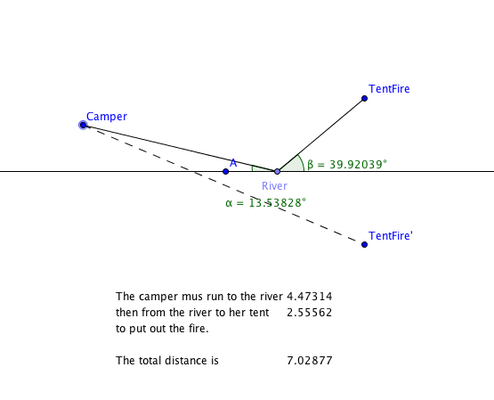
The burning tent (Geogebra lab)
In this Geogebra lab, we were out camping, when suddenly an ember from our campfire drifted over and set our tent ablaze! We had to find the quickest way possible to get from our current location to the river not to far from the campsite and back before our tent and campsite burned down. The screenshots below depict what I found to be the quickest and the slowest route to getting to the river for water and then back to the campsite in order to get the fire out in time.
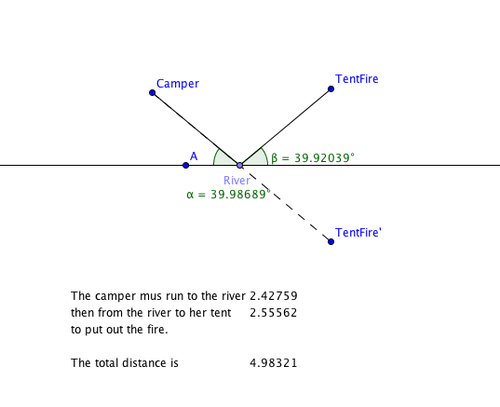
To the left, you can see the quickest route possible to get to the river for water, and then back to the campsite to put out our fire. I found this by reflecting the point (TentFire) over line AB (Point B is cut out of the picture) and then measuring the distance from my camper to point (TentFire')(Tent Fire Prime) This mimics my movement, and gives me an easy way to calculate how far the distance is. Note the distance is 4.98321 and lets take a look at how I should not get to the river and back.
To the left, you can see the way I should not go to the river and back. It takes me a lot longer to get to the river, and you can see that I added almost 3 onto my total distance. The way that I can determine that this is not the quickest route possible is by examining the line I made from point (Camper) to my reflection of point (TentFire). The dotted line I made is not matching up with the original line from the camper to the river, and is much longer as you can see from the top. It added a lot more distance onto my route, and possibly caused my tent to completely burn down.
In this lab, I learned a lot about how I can use reflections to make my life a lot easier. When I reflect my point over the line, it instantly became a really easy and simple way to determine the distance from my camper to the river and then to my burning tent. The geometry concepts that I used were reflecting, measuring and changing lines so that I can figure out the best route possible to the river and then to my tent. As you can see in screenshot 1, the dotted line is matched with my line from my point (Camper) to my point (TentFire') which shows that is the shortest distance that I can possibly use to get water and then put my fire out. In the second screenshot, the dotted line is clearly not matched up with my original Camper/River line, showing me that this is not the shortest way possible. This lab I really enjoyed doing, because all of this is things that I might need to calculate in my head for if something like this were to happen, and I hope we do more labs like this in the future!
